Documents & media
The chart's filing cabinet: browse the Media tab, upload files, let automated import extract data, group multi-page documents, view and edit details, and find signed forms.
Documents & media
The chart's filing cabinet: browse the Media tab, upload files, let automated import extract data, group multi-page documents, view and edit details, and find signed forms.
Browse a patient’s documents
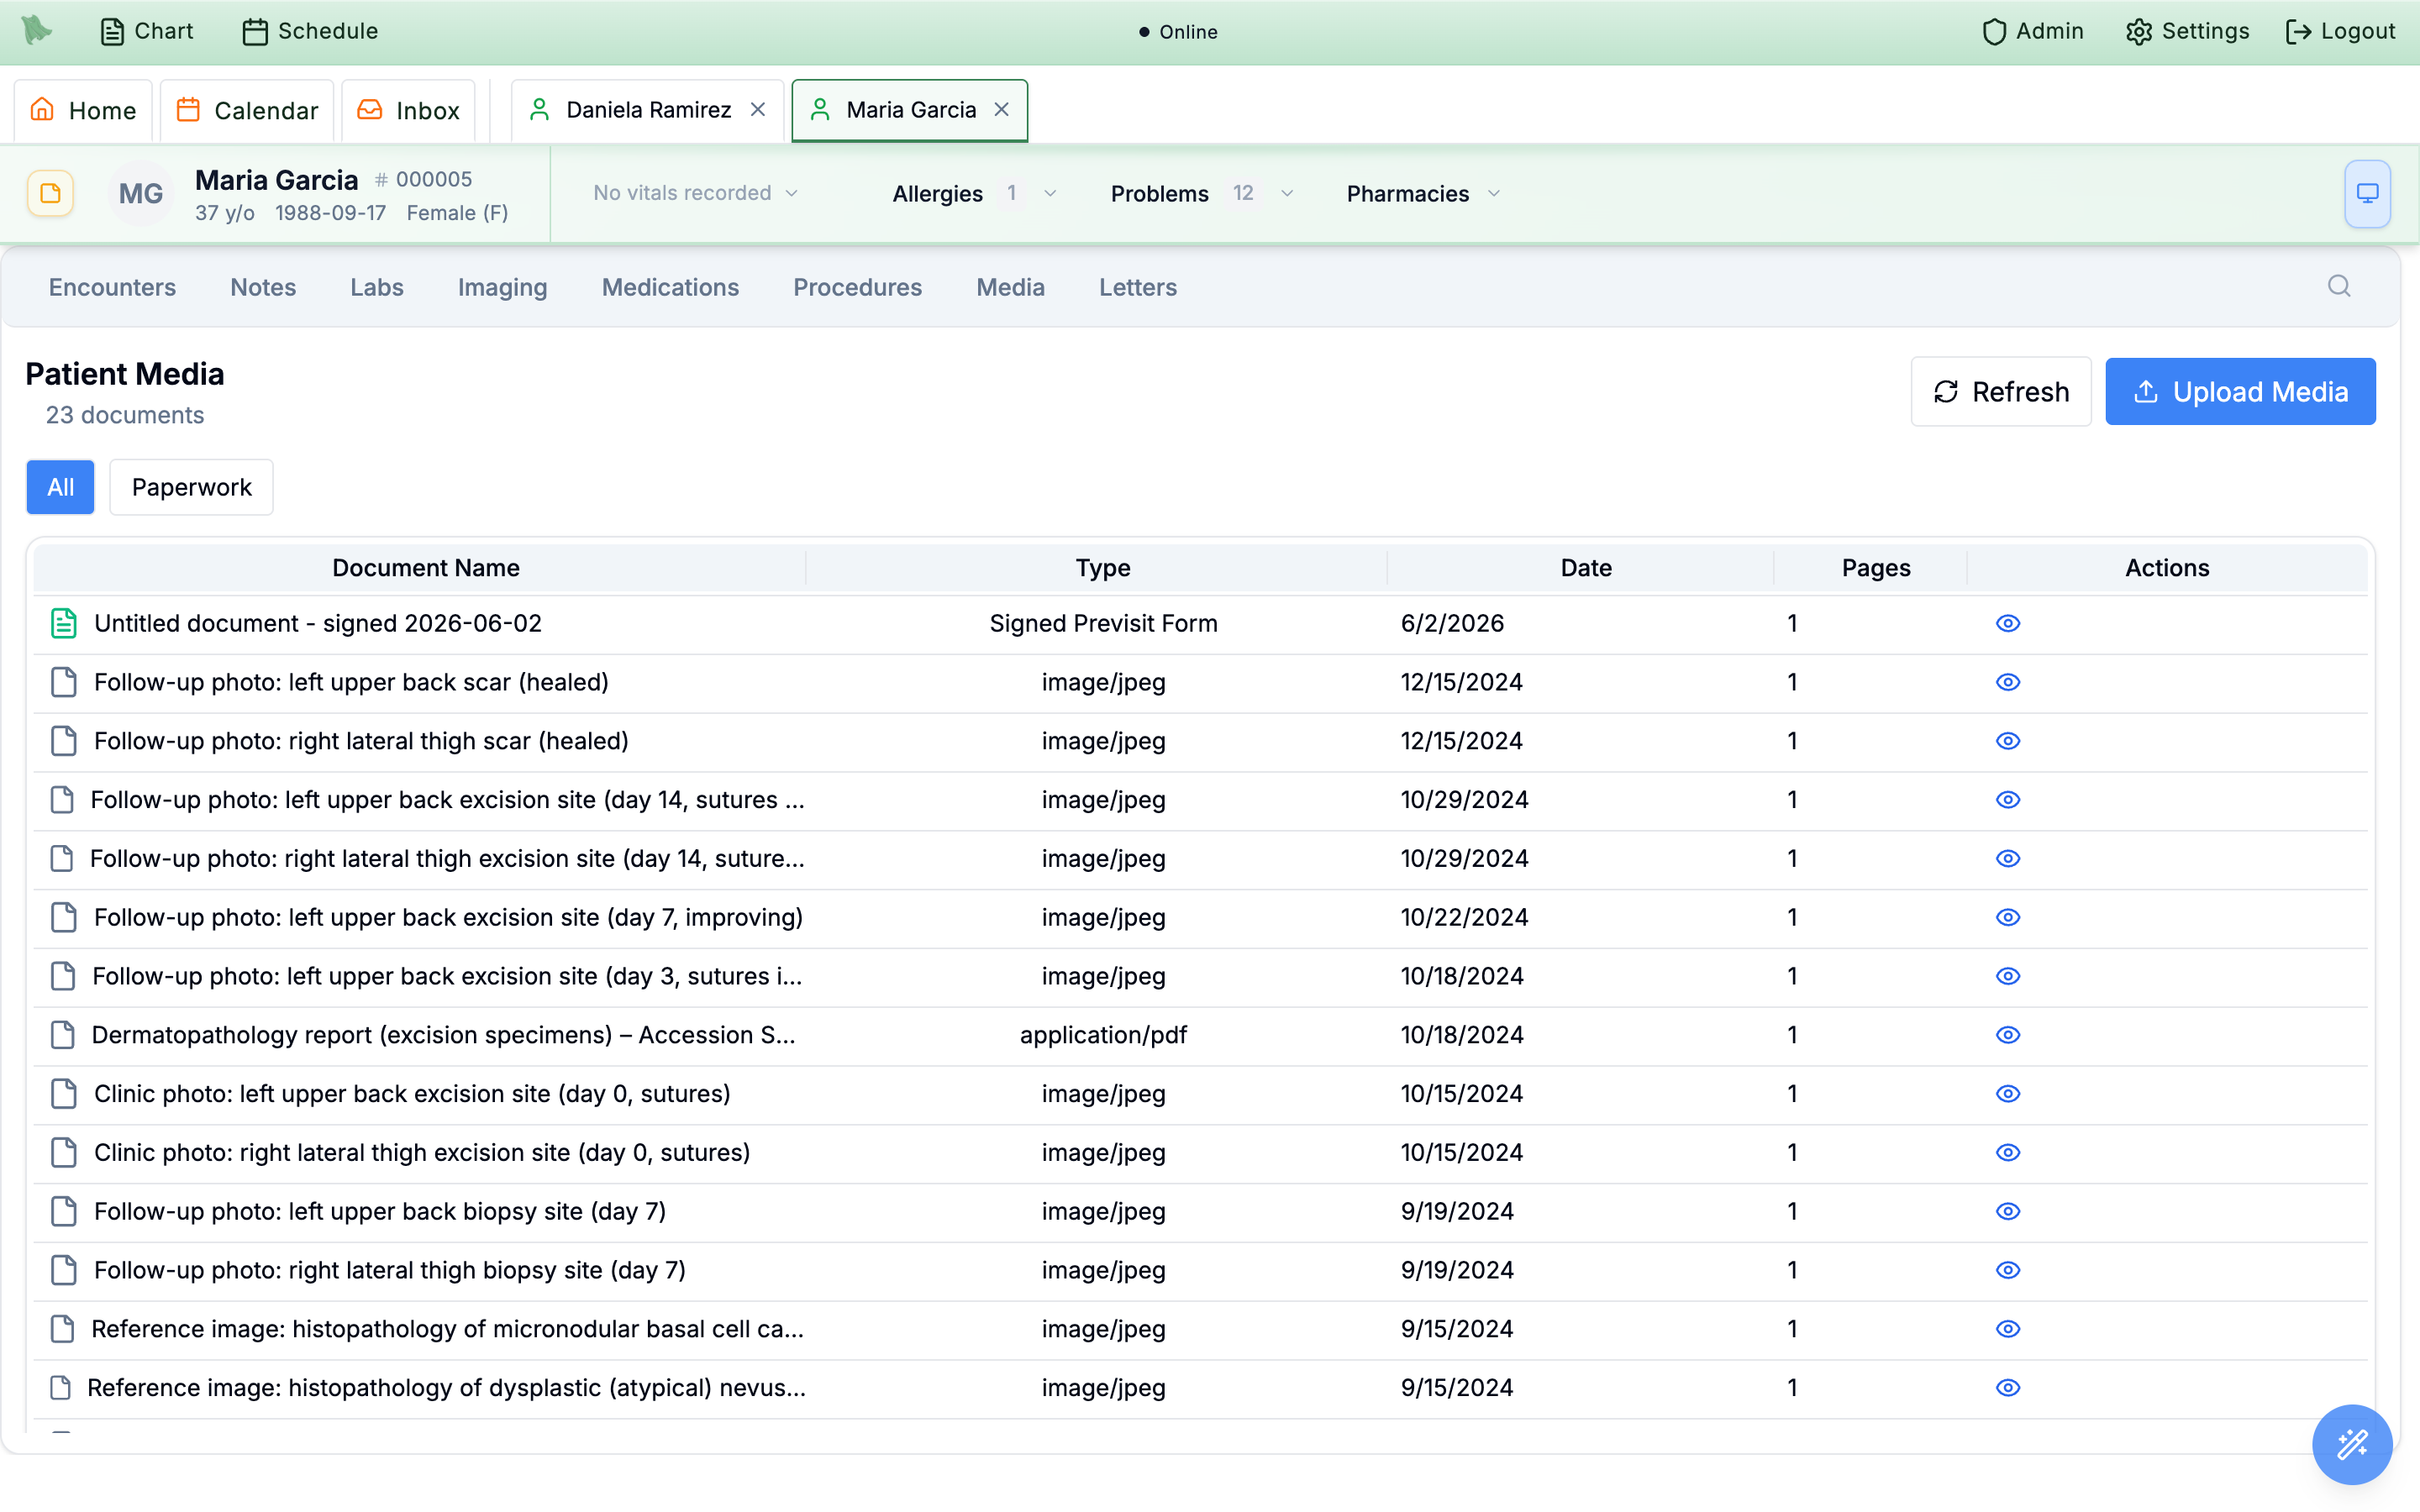
The Media tab on the patient chart is Hero EMR’s document home: scanned records, clinical photos, signed forms, and imported faxes all live here, as single files or multi-page grouped documents. The header reads Patient Media with a live document count, a Refresh button, and the primary Upload Media button. Documents are grouped by type, including:
-
Open the tab.
In the chart tab bar,
Mediasits betweenProceduresandLetters. A chart with no documents shows No media files found for this patient with anUpload First Filebutton. -
Filter with the chips.
Two chips sit above the list:
AllandPaperwork.Paperworknarrows the list to signed previsit forms only (see Signed forms & patient visibility). TheTime | Typeswitch shows the dated table (Time, the default: all documents, newest first) or the documents grouped by type (Type); this browser remembers your choice. -
Read the table.
Columns are
Document Name,Type,Date,Pages, andActions, with a color-coded icon per document type (green for a Lab Report, blue for an Imaging Report, and so on). TheDatecolumn shows the clinical document date when one was captured, otherwise the upload date. Grouped multi-page documents and single-file uploads share one list — thePagescolumn tells them apart. When everything has loaded, the list ends with All documents loaded. -
Open a document.
Single-click selects a row; double-click it — or click
View— to open the document viewer. -
Use the row’s menu for everything else.
Each row shows
Viewand a…button (More actions) that opens the same menu as right-clicking the row: rename the document,Extract to chart,Undo importandRemove kept results(see Undo an import),Scan as insurance card(photos and PDFs, for people allowed to scan cards), and remove it (which asks first). A spinner beside the row shows an extraction or card scan that is still running.
Upload Media in the header.Read fax inbox and external record import jobs., Link, forward, and complete document triage., or Import documents into the medical record. — granted under Staff & assistants.
Remove a document filed by mistake
Physicians and staff with document-import permission can use the row’s Remove document action or right-click and choose Remove document. Confirm in Remove document?. Removal closes the pending import review, but notes, diagnoses, and results already imported stay in the chart. To take them out too, choose Undo import from the document’s menu first (see Undo an import). If the file was attached to the wrong patient, those records need a separate correction.
Upload files to the chart
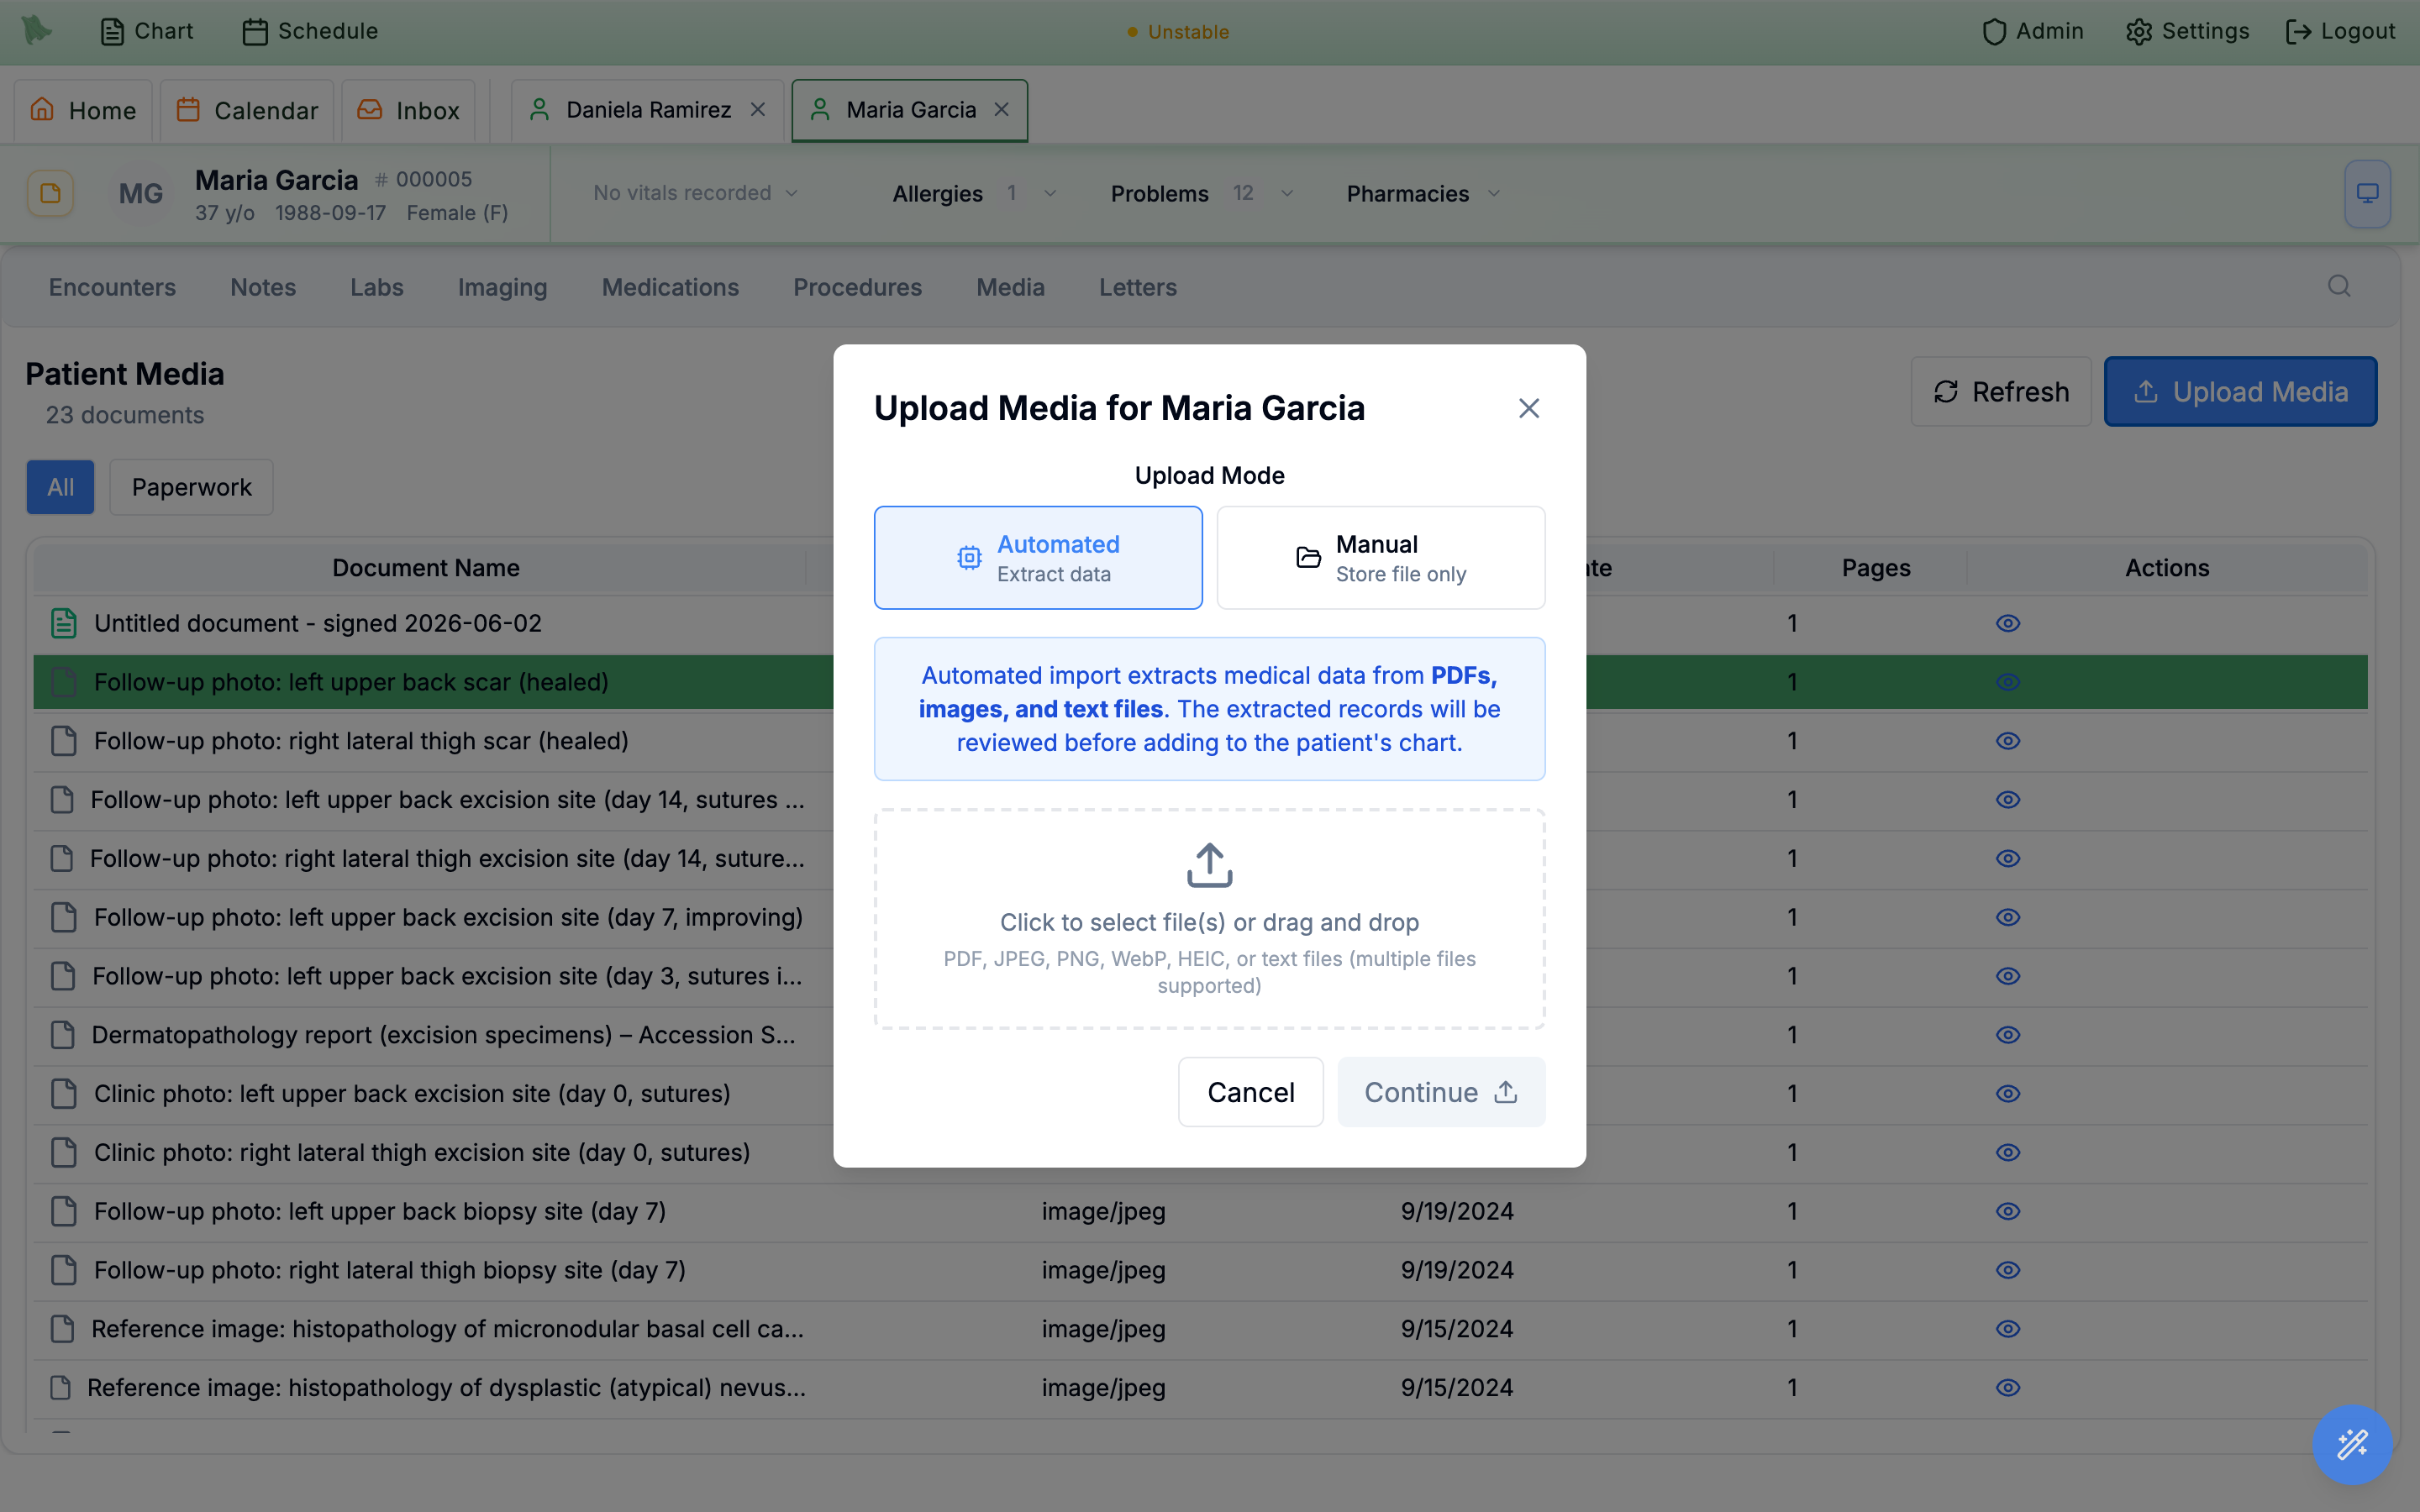
Open Upload Media and choose the purpose of the upload:
| Mode | What happens |
|---|---|
Imported note | Review a previous clinical note and create an encounter for billing. Use Review note to send it to the Imports workspace. |
Extract data | The default. Extract labs, medications, and other clinical records for review. For one file, Review data opens Imports; for multiple files, Continue opens document grouping. |
File only | Store the file without extracting records. Choose the media type and optional description, then Upload. |
Upload Media is offered to every practice member who may add documents; billing staff, who have read-only charts, don’t see it. On a minor’s chart the dialog adds a Hide from parents and guardians switch, with a line saying what parents and guardians will see, and a File only upload also offers a Visit to tie the file to. The switch starts on when the chosen visit is hidden from parents. When your practice has ECG and imaging uploads turned on, the media types include ECG / Imaging (DICOM) (ECG & imaging files).
Add files with the picker or drag them into the dialog’s drop zone. Each file can be up to 50 MB. Extraction supports PDFs, supported images, and text; the dialog identifies unsupported types or large images that need compression. Multiple-file grouping has its own file checks. Review any Failed files before leaving.
Single-file extraction and imported-note jobs keep reading in the background after the dialog closes. You can continue other work and return to Imports for review.
Outside records can also come in through Add documents on the chart’s Imports line, which opens with this chart chosen and can instead let Hero find the patient for each document (Add documents).
Add referrals, outside records and scanned paper
One window, Add documents, brings outside documents into Hero: a referral someone emailed you, records a patient brought in, a lab report, or a tray of mail. Hero can find the patient for each document and handle it like an incoming fax, or read it into a chart you choose. Open it from any of these:
Imports:Add documentsat the top of the queue, or drop files anywhere on the workspace (Drop to add).Inbox → Faxes:Add documentsin the toolbar.Inbox → Referrals:Add a referral, the header button inInbound(in the list’s menu in the other folders).- A chart’s
Mediatab:Add documentson theImportsline above the list, with that chart already chosen.
- Add the files. Drop PDFs or photos on the window, or click
choose files. The bin icon beside a file takes it off the list. With two or more files, tickThese files are pages of one documentwhen they belong together (a photo of each page of a letter, say): they are read together, in the order listed. Otherwise each file is read on its own. - Answer
Whose documents?(see the table). Opened from a chart, or from Imports filtered to one patient, it starts onOne chartwith that patient; everywhere else onHero finds the patient for each document. - Click
Add 2 files(Add as one documentfor pages of one document), or press Enter. The window turns into progress rows.Donecloses it and Hero keeps working;Add morestarts another add.
| Whose documents? | What Hero does |
|---|---|
Hero finds the patient for each document | Splits stacks, creates charts for new referrals, files results: the same as a fax. Hero reads every page and splits each file by patient, as it does an incoming fax: one patient stays one document, several patients become one document each, and one name with two dates of birth is held for you. Each document is then matched to its patient and handled exactly like a fax of its kind under your Fax Triage rules: a result files to the chart, a referral becomes an inbound referral, and anything else goes where its category is sent. A document Hero can’t place waits in Faxes for the person who added it. Takes PDF, JPEG, PNG, WebP or HEIC files, up to 20 files and 30 MB at a time. |
One chart | Read for that patient’s chart; you review before anything is added. Search by name, date of birth or MRN, or click a Recent: patient. The files are read for that chart, and nothing is added until you review them in Imports → Needs review. Tick This is one clinical note for a past visit note: it becomes one visit, with no separate labs or imaging. Also takes text files. |
Follow what Hero did
Each file gets a row: Reading page 9 of 16 while Hero reads, then Done with what it became (16 pages → 2 documents). Under it, one line per document says what it is (Referral, Lab report, Insurance letter…), whose it is (name and date of birth, or No patient yet), its pages, and what Hero did: Filed to chart, Referral created, 9 items to review, Waiting for review in Faxes or Needs a patient. The links take you on:
Reviewopens the document’s import inImports.Open referralopens the referral inInbox → Referrals.Choose patient(on Needs a patient) andOpen in Faxesopen the document inFaxes, where you link the patient, create one or file it as for any fax (Link & import).
The same rows show under Reading now at the top of the Imports queue (what you added in the last 24 hours; Clear finished, or Dismiss on a finished row, puts them away) and on the upload in Faxes. A One chart upload shows its import instead: Reading for chart data · page 4 of 10, then 9 items to review with Review.
When Hero can’t tell where each document starts
Splitting a multi-page file needs AI reading on with room left in the month’s page budget (Admin → Fax Triage → Reading), and a file of 200 pages or fewer. Without that, or when the AI couldn’t read every page, or the pages name one patient with two dates of birth, the upload is held as Not split: Hero couldn’t tell where each document starts, with the reason. Nothing is filed; it waits for you in Faxes.
- The pages are one document? Click
This is one documenton its row or on the upload in Faxes. Hero makes one document of it, then matches and handles it like a fax. The person who added it and staff with document-triage access can do this. - Several documents? Scan them again with a separator sheet on top of each document, and add the new scan.
A one-page file, files marked as pages of one document, and a stack with separator sheets need no AI to know where each document starts.
Scanning a tray of paper
- Print the separator sheet. Under
Hero finds the patient for each document, clickScanning a tray of paper?Print the separator sheet. Reuse it; keep it clean and unfolded. - Put one sheet face up on top of each document, then scan the whole stack into one PDF.
- Add the scan. Hero starts a new document at every sheet and leaves the sheets and blank pages out; finding the documents this way needs no AI. Each document is then matched and handled like a fax.
Import documents into the medical record. or Link, forward, and complete document triage. There is no setting to turn on: Fax Triage settings no longer have a Scanning switch. One chart also needs the import permission, so staff with document triage alone see only Hero finds the patient for each document. What you add goes to your own Faxes inbox, so Faxes doesn’t offer Add documents while you work someone else’s inbox (Attached inboxes).Hero finds the patient for each document: more than 20 files or 30 MB at once, a file of more than 500 pages, a text file (use One chart), a password-protected PDF, and a file already added in the last 30 days (already added in the last 30 days. It is in Faxes.).Review extracted records before filing them
The Imports workspace keeps document processing and review in one queue: In progress, Needs review, Done, and Failed. Open it from the toolbar or the patient’s Imports strip. You can leave while a job reads; closing the workspace does not cancel background processing. Add documents at the top of the queue, or files dropped anywhere on it, adds more (Add documents); what you added for Hero to sort shows under Reading now at the top of the queue.
- Verify the patient. Compare the document’s name and date of birth with the selected chart. A mismatch requires an explicit patient confirmation before records can be imported. Do not confirm a different patient just to bypass the warning.
- For a minor, check the privacy card. A minor’s document gets a privacy card with a
Visitchoice (visits near the document’s date; ones hidden from parents are taggedHidden from parents) and theHide from parents and guardiansswitch. It starts on, and says why, when the chosen visit, a visit that day, or the document’s own date is hidden from parents, or when some pages couldn’t be read (On because some pages couldn’t be read, so the document’s date isn’t known.). If Hero can’t check the visits, the file stays hidden unless you turn it off. Importing waits until the check has loaded. See Hidden visits & items. - Compare extracted records with the source. Review labs, medications, diagnoses, and other records. The
Source checkidentifies lab rows that disagree with the printed source, scan-only checks, and unchecked pages. Use the page links and acknowledge the comparison when required. Check values, units, ranges, dates, and panel grouping. - Code uncoded diagnoses when appropriate. A diagnosis marked
No ICD-10 code in the documentoffersChoose code. Select the correct code from search;Changerevises your choice. A diagnosis still needing a code is not ready to be filed as a coded problem. - Choose the records to file. The main button names the number of selected records, such as
Import 3 records.Save file onlykeeps the source without adding its extracted records;Skip for nowleaves review for later.
Use J/K to move through the queue and Ctrl/Cmd+Enter to import when the review requirements are met. Filed records appear in their chart categories; the source document remains in Media.
Where each import came from
Each queue row has a chip saying where its document came from: Fax, Added (added with Hero finds the patient for each document), Upload (uploaded into the chart) or Exchange; point at it for the full label. The review’s From card spells it out, for example Fax · (555) 201-3344, Added by Ana Ruiz (with the pages it came from, such as pp 1–12 of the added file), Uploaded by Ana Ruiz or Health information exchange. For a fax or an added document, Open in Faxes opens it in Faxes, where its Chart import line says how many records wait (3 waiting for review) and Review in Imports brings you back.
Outside clinical notes, and their medications and allergies
A fax, or a document added for Hero to sort, is read like any outside document even when it is a clinical note (most referral and consult faxes): its labs, imaging, medications, allergies and diagnoses come to the review as separate records. Only a person reads a document as one note: This is one clinical note under One chart in Add documents, or an Imported note upload. That note becomes one visit with its labs and imaging kept in the note, and its medication list and allergy list still come to the review as records under Medications and Allergies, next to its diagnoses under Problems; the lists also stay in the note’s text. Medications and allergies are never filed automatically, even when faxes file to the chart automatically: they wait in Imports → Needs review, and nothing goes on the chart until you approve it.
Extract from a document already in Media
Use Extract to chart on a supported document to start its reviewed import without uploading a second copy. The action is available on the row and its right-click menu for users allowed to import documents. Extraction still waits for review before filing records.
Procedures from outside procedure reports
An imported procedure report (an EGD, a colonoscopy, a biopsy, an operation) is proposed under Procedures in the review, one entry per procedure performed: a combined EGD and colonoscopy report gives two. Each carries its date and the CPT code printed on the report, or a Suggested CPT when the report printed none. Procedures never file on their own: approve them like any other record and they appear in Chart Review → Procedures, linked to the source document. A procedure already on the chart, even under another name (EGD and Esophagogastroduodenoscopy), isn’t added twice.
See every page of the original document
Records filed from an imported document link back to it: View original document on an imported study in Chart Review → Imaging (on its row and in its preview), the same icon on an imported note in the Notes tab, Open original on an imported visit’s outside note, View original lab report on an imported lab in the Labs tab, and View original document under Source on an imported procedure. The viewer opens on the page the record was read from. Use the Page N of M arrows, the numbered page list on the left, scrolling, or the ←/→ keys to see every page of a faxed or multi-page PDF; in fullscreen the page list runs along the bottom.
Undo an import: take a document’s records back out of the chart
If what a document added to the chart should not be there, undo its import. Undo takes out what that one document filed: notes, lab panels and their results, imaging studies, medications, problems, allergies, vitals and procedures. The document itself stays in the chart. Records from it still waiting for review are discarded. You can extract the document again afterwards.
- Choose
Undo import. In the chart’s Media tab, open the document’s…menu (or right-click the row). InImports, open the import underDoneand clickUndo import. - Read what it removes.
Undo import?checks the chart first and says what goes, for example “This removes 1 note and 31 lab results that came from this document. The document stays in the chart.” Anything it keeps is listed underKept because they were changed or are in use, with the reason (for example 1 medication · prescribed, renewed or refilled). - Decide about results you already reviewed. Lab panels and imaging studies someone already reviewed stay by default. To take them out too, tick the box below the list, for example
Also remove the 7 lab panels you already reviewed.(“The document stays in the chart, so you can still read them there.”). The box is unticked each time the dialog opens. Ticked, the summary is checked again and shows what goes with them. - Click
Undo import, orKeep importto change nothing. Import undone confirms it, for example “Removed 1 note and 31 lab results from Maria’s chart. The document stays in Media.” ClickExtract againin that message to read the document again; its records wait inImportsfor your review.
What undo always keeps
Undo never removes a record someone has worked with. Each kept record is listed with one of these reasons:
| Shown as | What it means |
|---|---|
| changed after import | Someone edited it after it was filed, for example corrected a value, verified an allergy, or reconciled or confirmed a medication. |
| signed or amended | A note that was signed, co-signed or amended. |
| prescribed, renewed or refilled | A medication that was prescribed, renewed or refilled after the import. |
| linked to other records, used on a visit, order or claim, part of a visit that is in use | Another record uses it: a visit, order, charge or claim, or a problem linked to another visit. |
| referenced in another note | It was added to another note with Add to note. |
| also in another imported document | Another import found the same record already in the chart and relies on it. |
| updated by a newer report | An imaging study that a newer report updated. |
| the only note on a signed visit | An outside note that is the only documentation of a signed visit. |
| reviewed in Results | A lab panel or imaging study someone reviewed: a critical value acknowledged, or its Results entry marked done, replied to, flagged or forwarded. Tick the box in step 3 to remove these too. A record kept for any other reason as well still stays. |
Remove results an earlier undo kept
If you undid an import without the box, you can still remove the reviewed results it kept. In Media, the document’s … menu offers Remove kept results. In Imports filtered to one patient, Undone imports kept results you reviewed lists each such document with how many results it kept, and a Remove kept results link.
Remove kept results? reads, for example, “This import was already undone. It kept 7 lab panels because they were already reviewed. Remove them now?” Click Remove results, or Keep them. Hero checks again first: anything changed or in use since then stays. If nothing is left to remove, the dialog says “Nothing to remove: what this document kept was changed or is in use now, so it stays in the chart and won’t be offered again.” Click OK.
The document’s Results entry
A document’s Outside result entry in Inbox → Results goes with its results when nobody acted on it. An entry someone marked done, replied to, flagged or forwarded stays as history. Once its results are taken out of the chart, it reads “Its results were taken out of the chart when the import was undone. The document is still in the chart.” and no longer says values were added.
Import documents into the medical record. An import that added problems also needs permission to manage the problem list; otherwise the dialog says “This document added diagnoses to the problem list. Removing them needs the Manage problem list permission, so ask a provider to undo this import.” Undo works on documents your practice uploaded or faxed in, once they finish reading. Records Hero brought over from your previous EHR can’t be undone here; contact Hero support.
Group multi-page uploads into documents
Select two or more files in Extract data mode and Hero EMR runs the batch flow: the AI scans every page, classifies it, and proposes how the pages assemble into documents — a five-page hospital packet becomes one five-page document instead of five loose files. Inbound faxes imported from the Inbox arrive in the Media tab the same grouped way (see importing faxes).
-
Let the scan run.
The modal steps through
Uploading FilesandScanning Documentswhile the AI classifies pages. -
Answer the grouping question.
A
Grouping Decisionstep may ask Are all pages part of one encounter packet? ChooseYes, one encounter packet(“Import as one continuity document anchored to the first informative page.”) orNo, multiple studies/documentsto continue to manual review and split or merge groups yourself. -
Review the document groups.
Review Document Groupsshows the AI-suggested groups; any classification warnings appear in a yellow banner at the top. Per group you can rename it (pencil icon,Edit name), change the document type,Splita multi-page group into separate documents, or remove the whole group (Remove group). Within a group, reorder pages withMove up/Move downor pull one out withRemove from group; clicking a page shows it in the right-handPreviewpanel. -
Confirm.
Confirm & Uploadcreates the documents — the modal showsCreating DocumentsthenUpload Complete(“N documents have been added to the patient’s chart. Data extraction has started.”). The grouped documents appear in the Media list with their page counts.
Imports to review the extracted records before they are filed into chart categories. If batch processing fails outright, the Upload Failed screen offers Upload Manually to fall back to a plain manual upload. And note that removing every group leaves No document groups. All files have been removed. with Confirm & Upload disabled.
Confirm & Upload. Walk away from the review step and the batch is discarded 24 hours after upload, so a batch you meant to finish tomorrow morning is safe, but one left over a long weekend is not. Nothing reaches the chart until you confirm; re-upload the files if a batch has aged out.
View documents and edit their details
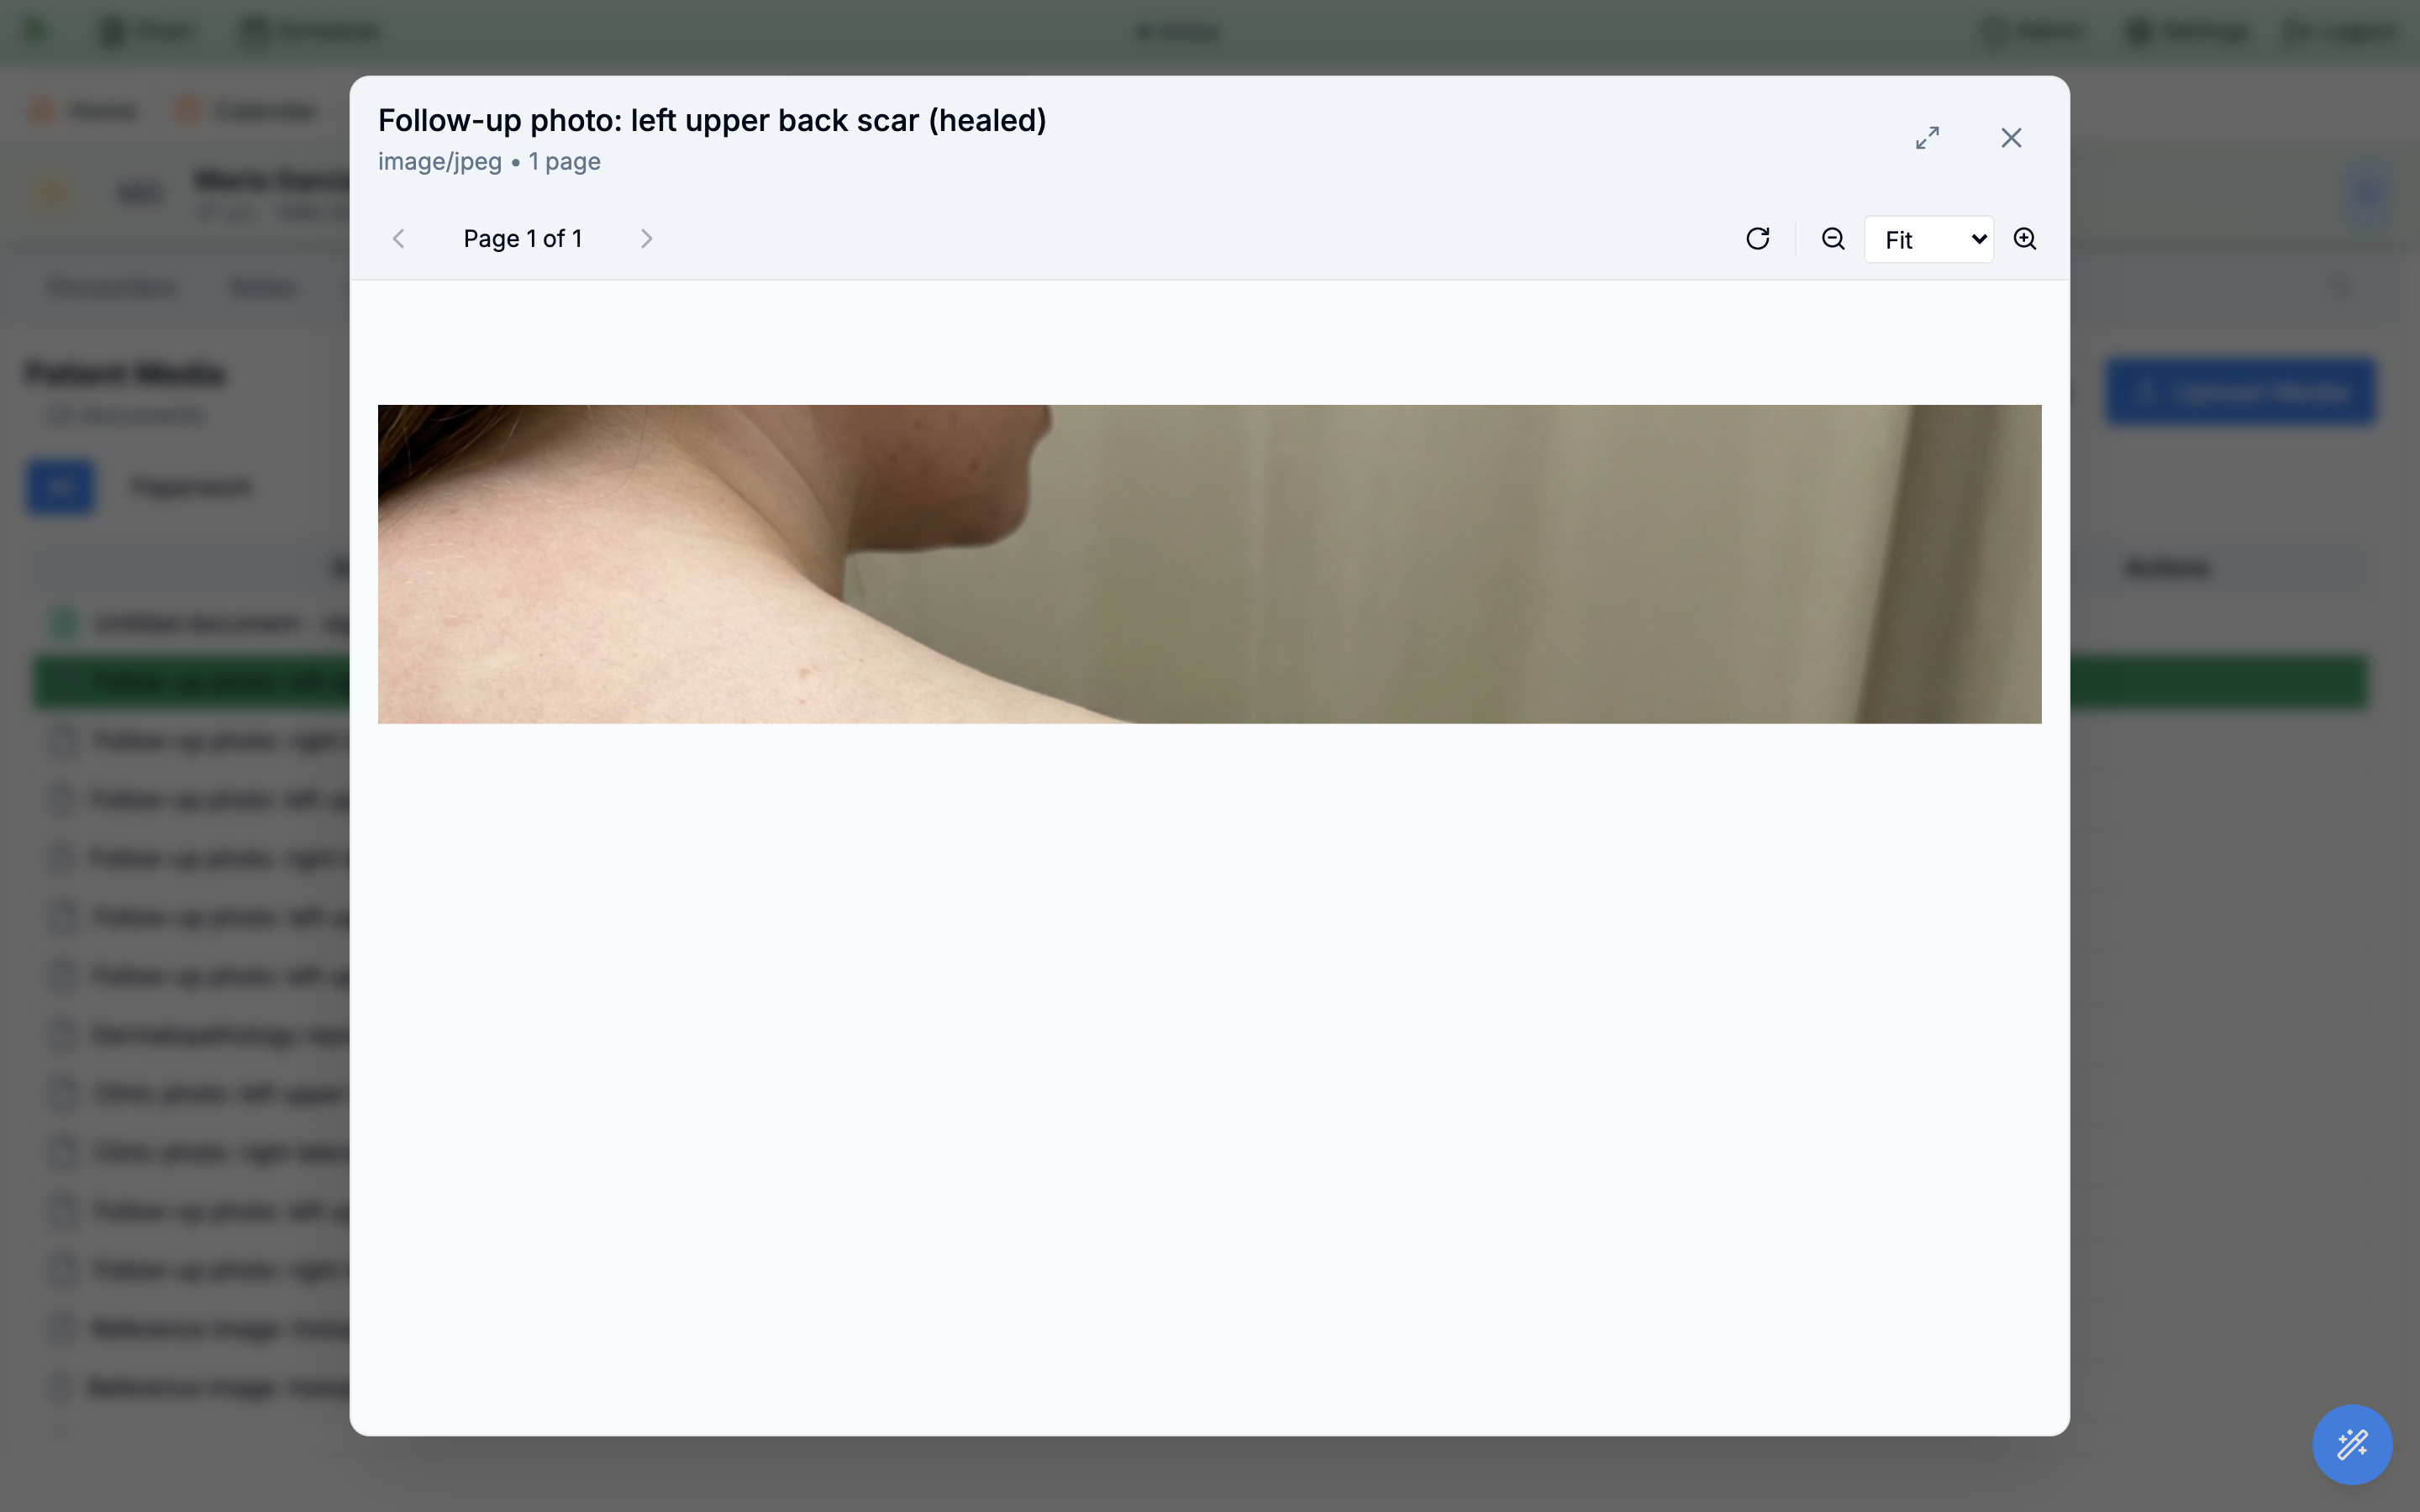
Double-clicking a row (or clicking the eye View icon) opens the shared document viewer — a large dialog whose header shows the document name with its type and page count (for example “Lab Report • 3 pages”). Multi-page documents get a thumbnail sidebar on the left for jumping between pages. PDFs and images render in-line; files that cannot be previewed offer a download instead. File kinds are shown in readable terms such as PDF or image.
-
Navigate the pages.
Use the previous/next arrows with the
Page X of Ncounter. PDFs get an extra inner control —PDF X/N— that steps through pages inside the PDF file itself. -
Zoom, rotate, pan.
Rotate (R), zoom in/out buttons, and a zoom dropdown fromFitup to 200%. Zoomed past Fit, drag the page to pan (a Drag to pan hint appears on hover). -
Go fullscreen for reading.
The expand button opens a black fullscreen mode with the same controls plus a thumbnail strip along the bottom;
Exit Fullscreen (Esc)returns to the dialog. -
Edit a grouped document’s details.
For grouped documents, the pencil button (
Edit metadata) opens an edit panel to change the document name,Document Type(a dropdown withSelect type...and the available types),Document Date,Author, andFacility.Savecommits,Cancelbacks out, and the saved date, author, and facility show in a footer strip below the page.
| Keys | What they do |
|---|---|
| ← → (or ↑ ↓) | Previous / next page |
| Home / End | Jump to the first / last page |
| + / - | Zoom in / out |
| 0 | Return to Fit |
| R | Rotate |
| Esc | Exit fullscreen, or close the viewer |
Fit dropdown, and fullscreen.Edit metadata panel appears only on grouped documents; single-file manual uploads open in the same viewer without an edit button.
Retrieving from archive means Hero has already requested the stored file. Wait for the indicated retrieval period, then use Check again where offered or reopen it. The same message can appear for note attachments, forms, letters, and fax attachments. It is not an instruction to re-upload the file.Signed forms, agreements & what patients can see
E-signed paperwork files itself. When a patient signs assigned previsit paperwork, the PDF lands in Media automatically — no scanning, no uploading — and the Paperwork filter chip surfaces exactly those forms.
Signed previsit forms
- Typed
Signed Previsit Form, named <Template name> - signed <date>. - These are what the
Paperworkchip matches; with none on file it shows No signed previsit paperwork found for this patient. - Authoring and assigning the paperwork itself lives in the questionnaire & paperwork chapter.
APCM agreements
- A signed enrollment generates a PDF typed
APCM Agreement, named Advanced Primary Care Management Agreement — signed <date>. - These stay under the
Allchip — thePaperworkfilter matches signed previsit forms only. - They’re financially gated: only staff holding a billing-view permission (
billing.dashboard.view,billing.reports.view, orbilling.ar.manage) see them in the Media list at all, and a direct link returns not found for anyone else. That’s the usual reason two people see different document counts on the same chart. - Enrollment itself is run from the APCM program.
Documents flow the other way too: patients can upload files from the portal’s media area (and the patient mobile app’s camera scanner), and those uploads appear in the chart Media tab alongside staff uploads — so check the upload date and document name when triaging. Inbound faxes can be linked to a patient and imported from the Inbox, creating a grouped document here (see importing faxes). To fax a chart document to an outside provider, use Fax on their Care team card and select the document (see Faxing a provider).
Health Records, where they can search, preview, and download their files (see the patient’s view of their records). For adults there is no per-document share toggle on the Media tab itself (on a minor’s chart, a file can be hidden from parents and guardians with its own switch): the two things that do hold a document back are org-level and encounter-level — an administrator can switch the portal’s Health Records feature off for the whole organization, and a document produced by an encounter is hidden from the portal while that encounter’s documentation is restricted (the Restrict or release encounter documentation in patient portal views permission). A document you upload straight to the chart has neither of those brakes on it. Treat the Media tab as part of the record the patient reads: don’t upload internal-only working documents.
File ECGs and imaging studies (DICOM) in the chart
Hero can take the files an ECG machine or an imaging CD produces (DICOM files), file them on the chart, and show them in the document viewer: ECG tracings you can measure, and images you can scroll and adjust. It is off until your practice turns it on.
Turn it on
- Open
Admin → ECG / DICOM devices(practice administrators, the owner and office managers who may manage practice settings).Device settingsin the ECG inbox opens the same window; anyone else sees the practice settings read-only: A practice administrator can change these settings. - Choose the practice settings:
Enable ECG and imaging uploads,Enable the ECG device inbox,Automatically file exact chart-number matches, andSend patient details to the ECG device (GDT), which needs the device’s short names, test code, character set and GDT version (confirm these with the device supplier). PressSave practice settings. - Connect the ECG computer, in one of two ways. Either way, the device files stay in the folder.
- With Hero Connect (no browser needed): on the computer the ECG machine exports to, install Hero Connect, then add the folder on that computer’s card in
Admin → Office devicesas aFolder of exported files (ECG, other machines)device (see Add a folder of exported files). Hero Connect sends each new export to the ECG inbox with nothing left open. - In Chrome: on the computer the ECG machine exports to, open Hero in Google Chrome, open the same window, give it a
Workstation labeland clickConnect export folderto choose the folder the device writes to. Keep Hero open on that computer to receive exports.Send to ECG(below) works only through this Chrome connection.
- With Hero Connect (no browser needed): on the computer the ECG machine exports to, install Hero Connect, then add the folder on that computer’s card in
Upload a study to a chart
In the chart’s Media tab, Upload Media → ECG / Imaging (DICOM) opens Upload ECG / Imaging. Choose files or Choose folder from the device or the patient’s CD (each file up to 250 MB). Hero lists each study it found — description, type, the patient named in the files, date, series and files — under the chart’s own name, birth date and chart number. If the patient in the files differs from the chart, you must tick the confirmation before uploading; if some images are already filed, it says where. Then click Upload. Physicians and staff allowed to import documents can upload.
The ECG inbox
- With the device inbox on, an
ECG inboxbutton on the toolbar shows how many exports wait to be filed. Each one shows the patient named in the file, birth date, chart number, study date and the ECG computer, withMatched by chart number,Possible match by name and date of birthorNo match. File in chartopensFile ECG in patient chart: check orChange patient, optionallyLink to the suggested visit on the study date, thenFile ECG. Always confirm the patient before filing.Dismissremoves an export from the inbox (The original file stays on the ECG computer.).Load older ECGsshows more.
Send the patient to the ECG machine
With GDT on, the chart header offers Send to ECG on the ECG computer (in Chrome): the patient’s details go to the device’s folder, and Hero confirms {name}’s details are ready for the ECG device. Confirm the patient on the device before recording. If another patient is still waiting there, choose Replace pending request.
Viewing
An ECG opens as a tracing with Speed (12.5, 25 or 50 mm/s) and Gain (5, 10 or 20 mm/mV); click two points on one tracing to measure time, and Clear measurement to start again. An imaging study offers Window / level, Zoom, Pan, Length, Angle, a contrast preset and Reset; the arrow keys scroll through the images. Download original gives the file itself. Hero prepares a printable copy of each ECG for printing or faxing (Preparing printable copy…). Older files in long-term storage show Retrieve archived files; refresh the study a few minutes later.
Need help? Email support@heroemr.com.